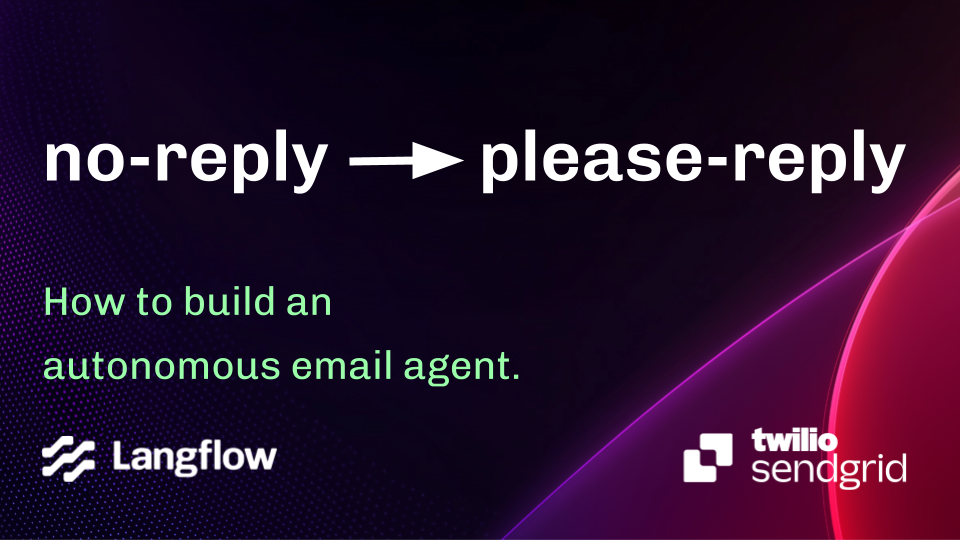
From 'no-reply' to 'please-reply': How to build an AI-Powered Email Assistant with Langflow and SendGrid
This post will walk you through how you can build your own "please-reply" system using Langflow, the easiest way to build AI agents, and SendGrid's Inbound Parse. We'll show you how you can build one for your own organization.
It's a familiar sight in our inboxes: the no-reply@vendor.com email address. We get them from our favorite apps, services, and online stores. They're announcements, receipts, and notifications that, while useful, represent a dead end in communication. In an age of generative AI, we can do better.
At Langflow, we're pioneering a shift from the impersonal "no-reply" to the engaging "please-reply." We're building systems that encourage our users to ask questions and get instant, helpful answers from an AI assistant, right from their email client. This not only provides a better user experience but also gives us invaluable insights into what our users need.
This post will walk you through how you can build your own "please-reply" system using Langflow, the easiest way to build AI agents, and SendGrid's Inbound Parse. We'll show you how you can build one for your own organization.
First: Try it out!
To get an idea of what it is we’re talking about, this system is already live and available for you to try out: send an email to please-reply@langflow.org and ask any question about Langflow. Within a minute or so, you’ll receive a reply with helpful information from our web properties and/or YouTube channel that can guide you on your Langflow journey.
But how does it work? Let’s explore what happens from the moment you hit “send”.
The Journey of a 'Please-Reply' Email
So, what happens when a user replies to one of our emails or sends a new email to please-reply@langflow.org? Let's trace the path from their inbox to an AI-generated answer and back.
- The User Sends an Email: A user replies to an announcement or sends a new email to an address like please-reply@langflow.org.
- SendGrid Receives It: We use SendGrid to handle our email. Instead of landing in a conventional inbox, the email is funneled into SendGrid's Inbound Parse Webhook.
- Webhook Magic: The Inbound Parse feature takes the incoming email, parses its content (sender, subject, body, attachments), and POSTs it as multipart/form-data to a URL we specify: our webhook.
- The Webhook Server: A simple web application (we use a TypeScript server) listens for these incoming requests from SendGrid. Its job is to:
- Extract and decode the email data: from, to, subject, and the email text.
- Clean the email body, removing reply chains and signatures to isolate the user's actual question.
- Send the cleaned question to our AI agent built with Langflow.
- Langflow's AI Agent Takes Over: The query is sent to a Langflow flow. Our agent is equipped with several tools: it can search our documentation, browse the web using services like Tavily, and even search our YouTube channel for relevant tutorials. It synthesizes all this information to generate a comprehensive answer.
- Sending the Reply: The Langflow agent returns the generated text. Our webhook then uses the SendGrid API to send this response as an email, directly back to the user who asked the question.
The result is a fast, contextual, and helpful reply, delivered to the user's inbox in minutes.
How to Build Your Own 'please-reply' System
Ready to build your own? Here's a step-by-step guide for developers.
Step 1: Configure SendGrid for Inbound Email
First, you need to tell SendGrid to catch emails sent to a specific domain and forward them to your application.
- Set up an MX Record: In your DNS provider, create an MX record for a subdomain you'll use exclusively for parsing incoming email (e.g., reply.langflow.org). Point it to mx.sendgrid.net..Warning: Do not change the MX record for your main domain. This could disrupt your primary email service.
- Configure the Inbound Parse Webhook: In your SendGrid account, go to Settings -> Inbound Parse. Add a new host and URL.
- Hostname: Enter the subdomain you just created (e.g., reply.langflow.org).
- URL: Enter the public URL of the webhook you're about to build. For local development, you can use a tool like ngrok to expose a local server to the internet.
Step 2: Build the Webhook
Your webhook is the core of this system. It's the bridge between SendGrid and Langflow. Here's how you can build it using a modern JavaScript framework like Astro and the @datastax/langflow-client to communicate with your agent. Astro is great for building websites, but we find it to be equally valuable for building API-only handlers when deploying to serverless platforms like Vercel, Cloudflare, Netlify, etc.
// src/pages/api/inbound-email.ts
import type { APIRoute } from "astro";
import sgMail from "@sendgrid/mail";
import { LangflowClient } from "@datastax/langflow-client";
import { InputTypes, OutputTypes } from "@datastax/langflow-client/consts";

export const POST: APIRoute = async ({ request }) => {
  // Ensure your SendGrid API key is set in your environment variables
  if (!import.meta.env.SENDGRID_API_KEY) {
    throw new Error("SENDGRID_API_KEY is not set.");
  }
  sgMail.setApiKey(import.meta.env.SENDGRID_API_KEY as string);

  try {
    // Parse the incoming email data from SendGrid's multipart/form-data
    const formData = await request.formData();
    const from = formData.get("from") as string;
    const subject = formData.get("subject") as string;
    let text = formData.get("text") as string;
    const to = formData.get("to") as string;

    // Extract email from formatted string like '"Sender Name" <email@example.com>'
    const toEmail = to.match(/<(.+?)>/)?.[1] || to;

    // We only want to process emails sent to a specific address
    if (toEmail !== "please-reply@your-company.com") {
      return new Response(JSON.stringify({ error: "Invalid recipient" }), {
        status: 400,
      });
    }

    // A simple way to remove the reply chain from an email
    text = text
      .split("\n")
      .filter((line) => !line.trim().startsWith(">"))
      .join("\n");

    // Initialize the Langflow client
    // Ensure LANGFLOW_BASE_URL and LANGFLOW_FLOW_ID are set in your environment
    const client = new LangflowClient({
      baseUrl: import.meta.env.LANGFLOW_BASE_URL,
    });
    const flowId = import.meta.env.LANGFLOW_FLOW_ID as string;

    // Run the Langflow agent, providing a session_id to maintain conversation history
    const response = await client
      .flow(flowId)
      .run(`Today is ${new Date().toString()}\n\n${text}`, {
        input_type: InputTypes.CHAT,
        output_type: OutputTypes.CHAT,
        session_id: from, // Use the sender's email as a session ID
      });

    const replyText =
      response.chatOutputText() ?? "Sorry, I couldn't generate a response.";

    if (!replyText) {
      throw new Error("No response from Langflow");
    }

    // Add a footer to the reply
    const footer =
      "\n\n--\nThis is an automated response from our AI assistant. " +
      "Please reply directly to this email if you have follow-up questions.";

    const htmlReply = `<p>${replyText.replace(
      /\n/g,
      "<br>"
    )}</p><p><small>${footer.replace(/\n/g, "<br>")}</small></p>`;

    // Send the reply using SendGrid
    const msg: sgMail.MailDataRequired = {
      to: from,
      from: "please-reply@your-company.com", // Must be a verified sender in SendGrid
      replyTo: "please-reply@your-company.com",
      subject: subject.startsWith("Re:") ? subject : `Re: ${subject}`,
      text: replyText + footer,
      html: htmlReply,
    };

    await sgMail.send(msg);

    return new Response(JSON.stringify({ success: true }), { status: 200 });
  } catch (error) {
    console.error("Error processing email:", error);
    return new Response(JSON.stringify({ error: "Failed to process email" }), {
      status: 500,
    });
  }
};
To run this TypeScript example, you'll need to set up an Astro project.
1. Initialize a new Astro project:
# Create a new Astro project (choose "Empty" or a basic template)
npm create astro@latest
2. Navigate into your new project and install dependencies:
cd your-astro-project
npm install @sendgrid/mail @datastax/langflow-client
3. Create an API route file at src/pages/api/inbound-email.ts and paste the code above into it.
4. Set up your environment variables. Create a .env file in your project root:
SENDGRID_API_KEY='YOUR_SENDGRID_API_KEY'
LANGFLOW_BASE_URL='http://localhost:7860' # Or your deployed Langflow URL
LANGFLOW_FLOW_ID='YOUR_LANGFLOW_FLOW_ID'
5. Run the development server:
npm run devAstro will start a development server, and your webhook will be available at http://localhost:4321/api/inbound-email. You can use a tool like ngrok to expose this local endpoint to the public internet for SendGrid to access for local development.
Step 3: Create Your Langflow Agent
This is where the "intelligence" of your assistant comes from.
- Design a Flow: In Langflow, create a new flow. Start with a Chat Input.
- Connect an Agent: Drag and drop an agent component (like a CrewAI Agent or a Conversational Agent) onto the canvas and connect your Chat Input to it.
- Give it Tools: This is the crucial part. Equip your agent with tools to find answers. You can connect:
- A Tavily Search tool to let it search the web.
- A RAG (Retrieval-Augmented Generation) component connected to your documentation.
- A YouTube Search tool configured to search your channel.
- Any other tool available in Langflow, or you can write your own.
- Add a Chat Output: Connect the agent's output to a Chat Output component. This is the final response that Langflow will send back to your webhook.
- Deploy and get the Flow ID: Once you're happy with your agent, you can get the flow_id to use in your webhook code from the URL of your flow.
Now that you've got a webhook and a Langflow agent, you can test it out by sending an email to please-reply@your-company.com.
From a Cost Center to a Growth Engine
By moving from "no-reply" to "please-reply," you're not just improving customer satisfaction. You're transforming a support function from a cost center into a powerful engine for growth and user insight. Every question is an opportunity to learn what your users are trying to achieve and where they're getting stuck.
We encourage you to take the next step. Ditch the dead ends and start having conversations. Build a "please-reply" system for your organization and meet your users where they are: their inbox.
We're here to help you get started! Join our Discord community and follow us on X to ask questions, share your use cases, and get support from the Langflow team. Let's build a more responsive and helpful web, together.
Frequently Asked Questions
How does the email processing system work?
The system receives incoming emails through a SendGrid webhook, processes them through a Langflow agent, and sends back AI-generated responses. The webhook is implemented as an Astro API route that handles the incoming email data, removes quoted reply content, and forwards the message to your Langflow agent for processing.
What makes this different from traditional no-reply systems?
Unlike traditional no-reply systems that create dead ends in communication, this system actively encourages user engagement by allowing them to reply to emails. The AI agent provides immediate responses while maintaining a human-in-the-loop approach where the team can review and intervene when necessary.
Can I customize the AI agent's behavior?
Yes, you have complete control over the AI agent's behavior through Langflow's visual interface. Langflow provides a drag-and-drop interface where you can design complex AI workflows without writing code. You can add various tools like web search capabilities, documentation search, or YouTube search to help the agent find relevant information. The agent's responses are determined by the flow you design in Langflow, and you can easily modify the flow to adjust the agent's behavior.
How do I handle sensitive information in emails?
The system processes emails through your own infrastructure, giving you control over data handling. You can implement additional security measures in the webhook code, such as email validation, content filtering, or integration with your existing security systems.
What happens if the AI agent can't answer a question?
The system is designed to be transparent about its limitations. If the AI agent cannot provide a satisfactory answer, the question is still logged and accessible to your team. This allows for human intervention when needed, ensuring that no user query goes unanswered.
How do I monitor the system's performance?
You can monitor the system through various means: the SendGrid dashboard for email delivery metrics, Langflow's interface for agent performance, and your own logging system. The webhook code includes error handling and logging, which you can extend to track specific metrics or issues.
Can I use this with my existing email infrastructure?
Yes, the system is designed to work alongside your existing email infrastructure. You can set up the webhook to handle specific email addresses while maintaining your current email system for other communications. The integration with SendGrid makes it compatible with most email setups.
What kind of maintenance does this system require?
The system requires minimal maintenance once set up. You'll need to monitor the SendGrid API key and Langflow connection, update the agent's knowledge base as needed, and occasionally review the flow design in Langflow to ensure it's meeting your users' needs effectively. Langflow's visual interface makes it easy to update and maintain your AI workflows without requiring deep technical expertise.
How do I scale this system for high email volume?
The system can handle high email volumes through SendGrid's infrastructure and Langflow's processing capabilities. You can implement rate limiting, queue systems, or additional processing nodes if needed. The modular design allows for easy scaling and optimization based on your specific needs.
What's the best way to get started with this system?
The best approach is to start small with a specific use case, such as handling support emails for a particular product or service. This allows you to test and refine the system before expanding to other areas. Begin by setting up the basic infrastructure, creating a simple Langflow agent, and gradually adding more sophisticated features as you become comfortable with the system. Langflow's intuitive interface makes it easy to experiment with different agent configurations and tools.
How does Langflow help in building AI agents?
Langflow provides a powerful yet accessible platform for building AI agents through its visual programming interface. It allows you to create complex AI workflows by connecting different components like language models, tools, and data sources. The platform supports various AI models and tools, making it flexible for different use cases. You can easily test and iterate on your agent designs, and the visual interface makes it simple to understand and modify the flow of information through your agent.
Can I integrate Langflow with other AI tools and services?
Yes, Langflow offers extensive integration capabilities with various AI tools and services. You can connect it with different language models, vector databases, search engines, and other AI services. This flexibility allows you to build sophisticated agents that can leverage multiple AI capabilities to provide comprehensive responses to user queries.
How do I deploy and manage Langflow agents?
Langflow agents can be deployed through the Langflow platform, which provides hosting and management capabilities. You can monitor your agents' performance, update their configurations, and scale them as needed. The platform also offers version control for your agent designs, making it easy to track changes and roll back if necessary.
What kind of support is available for Langflow?
Langflow provides comprehensive support through its documentation, community forums, and customer support channels. The platform's visual interface makes it easy to get started, and there are numerous tutorials and examples available to help you build effective AI agents. The Langflow team is also actively involved in the community, providing guidance and assistance to users.